How Do I Install A Submersible Electronic Ignition System (SUBEIS)?
Creating a fire on water design is so much easier with a SUBEIS!
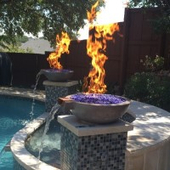
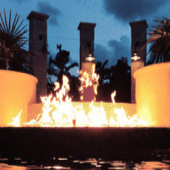
The Submersible Electronic Ignition System (SUBEIS) performs in ways that you'd expect to see only on the big screen! Wow your guests with an incredible fire on water display and get the poolscape you've always dreamed of. Designed for inline use or submersion, the SUBEIS delivers a powerful performance!
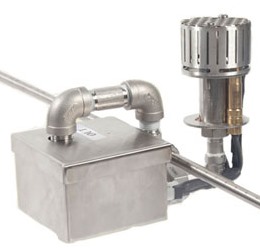 BRIEF OVERVIEW OF THE SUBMERSIBLE ELECTRONIC IGNITION SYSTEM
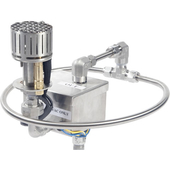
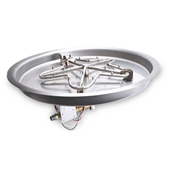
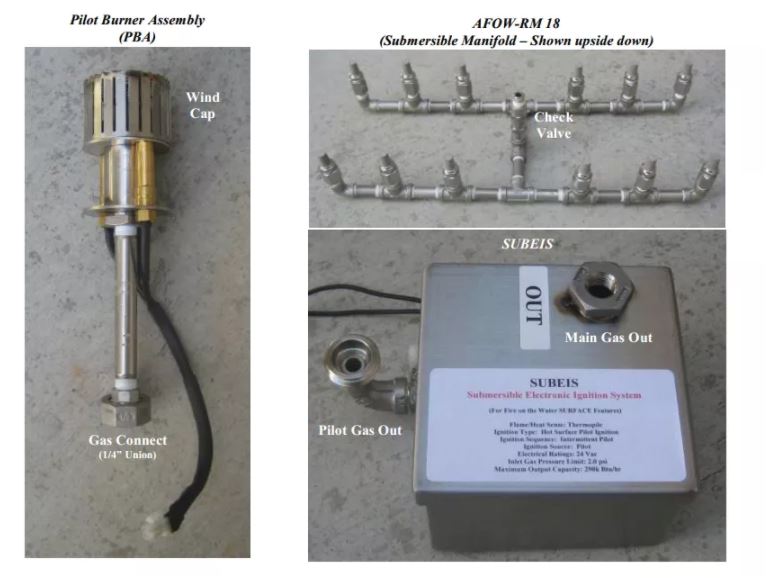
The SUBEIS (pictured at right) is a 24 volt waterproof electronic module that is designed for use with fire on water manifolds. Because it is totally waterproof, you can it can be operated below water and controlled with the simple push of a button. Innovative technology and the ability to sit below the water's surface make this the ideal solution for an amazing display of flames prancing on atop your backyard aquatic feature. The SUBEIS system is capable of providing up to 290 KBTUs (kilo-British thermal units) per hour! A micro-chip circuit board relights the fire if breezy conditions should blow the flame out. An additional built-in safety feature will attempt to relight the system up to three times before shutting down automatically, preventing dangerous igntions or free flowing, unlit gas flowing between your components.
SOME GENERAL SAFETY INFORMATION
Before we explain how to install an SUBEIS, let's cover some general information and safety instructions:
Gas Appliance Warnings
- FOR OUTDOOR USE ONLY.
- FOR USE WITH NATURAL AS OR PROPANE GAS ONLY.
- NO SOLID FUELS ARE TO BE USED WITH YOUR SUBEIS.
- Prior to connecting to your fuel source, make sure your SUBEIS is compatible with the available gas type (natural gas or propane).
- Appropriate input pressures are required for optimum appliance performance. All gas line sizing requirements need to following the NFPA51 Standard.
- Installation of an SUBEIS must conform with your area's local codes. In the absence of local codes, please adhere to and follow the National Fuel Gas Code, ANSI Z223.1.
- Once installed, the SUBEIS must be electrically grounded in accordance with your area's local codes; or in the absence of local codes, it must comply with the National Electric Code, ANSI/NFPA 70.
- Please have your SUBEIS installed by a qualified professional who is approved and/or licensed as required by the locality. A manual gas shutoff device must be installed prior to the location of the SUBEIS.
- Over or under tightening your gas supply lines may cause leaks! Gas lines should be tight, but not so much that the fittings exceed the threadings.
- Failure to follow these instructions exactly may result in a fire with the potential of property damage, personal injury, or death.
- Never store or use gasoline or other flammable vapors or liquids near or around an SUBEIS.
- Improper installation, adjustments, alterations, service, or maintenance can cause personal injury or property damage. Please read all installation, operating, and maintenance instructions thoroughly prior to installing or servicing your SUBEIS.
Inspection of SUBEIS and Components
- NEVER install damaged, incomplete, or substitute components.
Check For Gas Leaks
- Be sure to check all fittings and connections.
- Never use an open flame to check for gas leaks.
- Check for leaks with a commercially available, non-corrosive leak check solution.
What To Do If You Smell Gas
- Do not try to operate the SUBEIS.
- Refrain from touching any electrical switches.
- Refrain from using any landline phones on the premises.
- Immediately call a certified gas professional and follow his/her instructions.
- If you cannot reach a certified gas professional, call your local fire department.
- We highly recommend that the installation and any service or maintenance be performed by a qualified gas professional or service agency.
Lighting Instructions
- Before operating the SUBEIS, make sure the manual gas shutoff valve is open. This allows the gas supply to reach the ignition module.
- If you smell gas, STOP and follow the gas warnings above.
- Visually inspect your outdoor fire feature to there are no stray combustible materials close to your SUBEIS.
- Make sure other people close to your fire feature are aware that you will be igniting the SUBEIS.
- Turning on the electrical device used to power your fire feature. The ignition sequence is as follows:
- Electrical power is delivered to the unit.
- The hot surface igniter (glow plug) becomes hot enough to ignite gas.
- Once the ignitor reaches the appropriate temperature, the pilot gas valve opens and the pilot flame is lit.
- Within 10 seconds of power application, the pilot flame should be ignited and visible (if it's nighttime). At this time, the main burner element of the fire feature should also ignite.
- To turn your fire feature off, shut down the ignition module and/or manual gas shutoff valve.
- Note: Since the unit is based on thermo-electrical components, cutting electrical power will not extinguish the flames. In case of emergency, shut down the gas valve(s) instead.
HOW TO INSTALL YOUR SUBMERSIBLE ELECTRONIC IGNITION SYSTEM (SUBEIS)
Warnings:
- FIRE RISK / BURN RISK
- HOT! DO NOT TOUCH! SEVERE BURNS MAY RESULT! CLOTHING IGNITION MAY RESULT!
- The appliance should be inspected before use and at least once per year by a qualified gas technician.
- It is imperative that the control compartment, burners and circulating air passageways of the SUBEIS be kept clean. Frequent cleaning may be required as necessary.
- Do not let children handle the SUBEIS.
- CAREFULLY SUPERVISE children when they are near an operating SUBEIS.
- Alert children and adults to the hazards of high temperatures, electronic devices, and fire features.
- Clothing or other flammable materials should not be hung from, placed on, or positioned near the appliance.
- Operation of outdoor fire features is NOT recommended when wind speeds exceed 25 mph.
LP Gas Installation Considerations:
Due to the fact that LP (propane) gas is different from natural gas there are slight differences in the installation procedures as follows:
- Propane is a much more potent fuel compared to natural gas. For this reason, an air mixer must be installed in the burner element inlet to dissipate the gas. The orifice inside the air mixer is sized accordingly for the burner element. When ordering your SUBEIS, be sure to indicate the size and burner element type that you will be using with your fire feature.
System Components Overview:
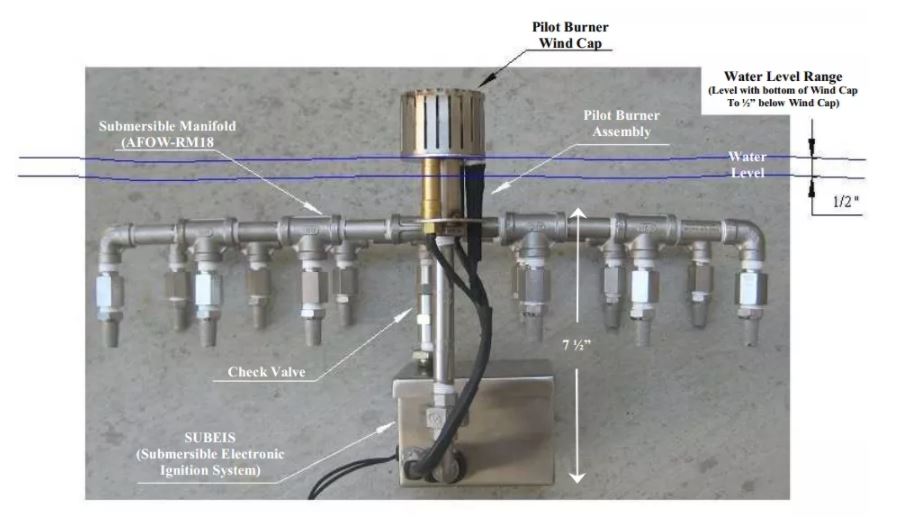
Below is a general configuration of a SUBEIS system with a fire on water manifold (please click on the pictures for larger views). Please take special note of the water level (as indicated by the horizontal blue lines), pilot burner assembly location, and installed manifold gas port orientation (in this case, the tips are pointed down and away from the pilot burner wind cap). It is very important that the ports on your manifold face down to prevent water from entering and thus flooding the ignition system. If water enters through the manifolds, the SUBEIS will not light.
Gas Requirements:
- Operating Gas Pressure for Fire ON Water SURFACE Features: 1.5 to 2.0 psi (Natural Gas or Propane).
Installation Overview
Below is an illustration showing of what a SUBEIS looks like when installation properly and completely:
Gas Plumbing Transition (Underwater)
Below is an illustration showing the preferred method for transitioning from a gas line that is housed inside a PVC sleeve, to your submerged system. (NOTE: this is by not the only method of transitioning).
Steps:
1. Connect To Gas Line
The first step to installing the components is to first connect the SUBEIS to your gas line inside the fire feature. All other components will then attach to the SUBEIS.
- CAUTION: The gas line MUST be purged of all dirt prior to connecting to the SUBEIS. For example: any dirt in the line that becomes mixed with as little as 2 psi gas will clog the valve and cause it to leak once the system is turned off.
2. Install Electrical Connections
Pictured below are the electrical connections. To ensure a watertight installation, we have provided you two DRYCONN waterproof connectors (see below the blue caps with orange interior wire nuts) along with two DRYCONN Grease-filled Strain Relief pieces (opaque connectors above the waterproof connectors). We recommend using both for maximum waterproof protection.
3. Connect An Underwater Manifold
Now it is time to install the submersible manifold. It connects to the female pipe threads labeled "out" on your SUBEIS. It is recommended to use pipe lubricant; however, thread tape will also work.
4. Install the Pilot Assembly
The next step is to install the Pilot Burner Assembly (PBA). In the photo below, the gas line is connected by way of a 1/4" union. The electrical connection is accomplished using the plug shown. We also included a small tube of Dielectric Grease with your SUBEIS system. You will need to squeeze a liberal amount of grease on both sides of the electrical connectors (circled in red). Then connect the two fittings by pushing the male end into the box and ensuring the locking tab locks are in place after the connection is made. (Lightly tug on the connections to ensure a secure fit.)
The following photo shows the finished PBA connections. If you look closely, you can easily see that the electrical jack is fully clipped in.
5. Assembled SUBEIS
The photo below shows you how your SUBEIS should look like once the components have been assembled together with this type of manifold (other sizes/shapes - the appearance will vary). Once the SUBEIS is placed into its final location, you can enjoy watching the flames dance on the water!
Click on the Add New button below to submit a question about this product. Please ONLY submit product questions. For all other inquiries, please contact us at 1-888-986-1535.


