How Do I Replace My Fireplace Door Gasket?
Due to the normal wear and tear that comes from opening and closing your fireplace door, gaskets will need to be replaced when they are no longer establishing a firm seal. The good news is, this is an easy DIY task that can be completed in a very short amount of time, right in your own home. (For a complete tutorial on how to test your high temperature gasket first, click here to be redirected to an instructional video!)
Just a friendly suggestion: it is a good idea to replace the window seal along with the door gasket.
SUPPLIES:
- disposable gloves*
- safety goggles*
- flat head screwdriver
- wire brush
- small vacuum or shop-vac
- new gasket
- gasket cement* (available in a tube or caulk-gun cartridge)
- heavy duty scissors
- caulking gun
- damp cloth
*Gasket cement can cause skin and eye irritation! Protect yourself when using this material.
HOW TO DO IT:
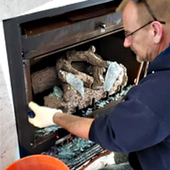
- Carefully remove the fireplace door and place it on a soft padded surface. Seek out some help from a friend if your door is heavy.
- Using your screwdriver, pry out and remove the old gasket.
- Thoroughly clean out the channel, making sure to remove all the old adhesive with a wire brush. After this is complete, clear the channel of any dust with a small vacuum or shop-vac.
- Try in the new gasket. Determine the appropriate length and then cut the gasket with the heavy duty scissors.
- If using a tube cement application, squeeze it a few times to ensure the cement is evenly distributed.
- If using a cartridge, shake well before cutting the nozzle to the desired opening. Insert into a standard caulking gun, then gently squeeze the handle to apply an even bead of adhesive into the channel.
- Apply the adhesive cement into the door channel.
- Press the new gasket firmly into the adhesive. The gasket will need to be bonded at both ends where the butt joint is made.
- Remove any excess cement with a damp cloth before it dries.
- Replace and close the fireplace door.
- Allow the adhesive to dry thoroughly overnight before exposing the cement to heat. When you do ignite a fire, gradually increase the heat to initiate the final cure of the adhesive.
Although your glass window gasket doesn't undergo the same compression forces as your door gasket does, you can replace it at the first signs of fraying or unraveling material. However, as a good rule of thumb and to avoid oversights of the seal's condition, it is recommended that you replace the window gasket simultaneously with the door seal.
How Do I Paint A Fireplace Door or Heat Stove?
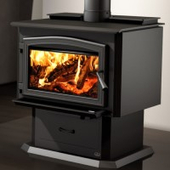
If you have a scuff or scratch on your fireplace door or heat stove, fear not! We have some easy to use, heat resistant fireplace paint that will yield professional results! If you have a fireplace door that features a charcoal or black finish color, or if you are thinking about completely repainting your stove to match your updated décor, there is an easy way to restore the surface to like new condition!
Stove Bright paint colors are designed to prevent rust, resist heat, and give your heat stove or fireplace door a gorgeous finish that command attention. For a full visual demonstration, click on the video links below!
Mr. Stove Bright® and Scuffing the Stove Surface
Watch on YouTube
Before we get started:
- If you have a decorative fireplace door or stove with a custom finish, we highly recommend consulting the owner's manual for your application to determine the appropriate steps to take in order to touch up the flaw in question.
Make sure you have the following supplies on hand:
- Rubber gloves
- Protective eye-wear
- Drop cloth to protect your furnishings
- Paint scraper
- Wire brush
- Degreaser or dish soap
- Cloth rags
- Fine-grit sandpaper or scotch-brite pad
- Stove Bright high temperature paint color of your choice
IMPORTANT: You may want to test the Stove Bright on a small surface area first. If the existing paint bubbles or lifts, you are going to need to remove the finish entirely before applying Stove Bright. If your door or application has been painted with Stove Bright in the past, you'll just need to scuff the surface, wipe it clean, and you're ready for a new application!
-
Prepare the area that needs to be repainted by scuffing the previously painted surface with a scotch-brite pad or fine-grit sandpaper. The goal is to simply roughen up the surface – you don't want to remove the paint entirely.
- Wipe the area with a clean cloth. You can also spray the rag with paint prep (found at your local hardware store) to help remove any remaining debris and paint dust. The cleaner your substrate surface is, the better it will accept the new paint.
- Shake the can (regardless if you are using aerosol or brush on paint) for 2 minutes to ensure the pigment is well mixed. If you are using the aerosol paint, spray some paint onto a piece of cardboard to ensure a clear flow of the product to the nozzle.
- Two to three light coats are recommended to achieve the best finish.
- If you are brushing on the paint, apply a thin coat with a soft bristled paintbrush.
- If you are spraying on the paint, hold the can 12 to 15 inches away from the surface and apply a light mist coat, using a back and forth (horizontal) motion to resemble dotting on the surface.
- Allow the first coat of paint to dry for 15-20 minutes.
- Apply your second layer in the same manner as in Step 4.
- Allow the second coat to set for 15-20 minutes.
- Inspect the surface. If there are any remnants of the previous paint job that are showing through, or if the surface appears to have uneven coverage, you'll need to apply a third light coat. If the product was laid evenly and the finish is to your satisfaction, you can skip Step 9.
- Apply a third light coat in the same manner as in Step 4.
- Let the paint self-cure for a minimum of 2 hours (4 hours is recommended) before exposing the paint to any kind of heat. The final setting of this paint is formulated to be heat cured, although it will “air cure” in 48 hours.
What Is The Best Way To Clean Fireplace Glass Doors?
Over time with extensive use, soot and ash build-up can stain the glass on your fireplace door. This grime is literally baked onto the surface of the glass, and can be difficult to remove if you don't clean your doors regularly.
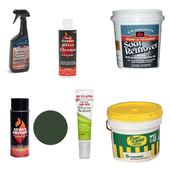
Fortunately, there are some terrific products out there that are formulated to remove creosote and other forms of residue quickly and effectively! Depending on the heating application that you have, you can get a formula that is specifically designed for tempered or ceramic glass. Here are some of the cleaning products that we know and trust:
- Clear Flame Glass Door Cleaner: safe to use on tempered and ceramic glass, as well as brass, enamel, and painted or lacquered surfaces!
- Hearth Glass Creme Cleaner: safe to use ceramic glass only! Can be used on stainless steel surfaces. NOT for use on tempered glass or plastic! We have a kit available too - includes a microfiber sham for professional cleaning results!
- Speedy White Hearth & Stove Cleaner: safe to use on tempered and ceramic glass, plastics and vinyl, but NOT recommended for brass, aluminum, or slate!
No matter which product you opt for, there are some steps to take in order to get your fireplace glass door looking like new.
SUPPLIES:
- Wood ash vacuum or shop vac (a regular household unit will blow ash particles back into the room)
- Glass cleaner
- Soft cloths
- Bucket of warm water
WHAT TO DO:
- Before beginning, make sure that your fireplace glass has completely cooled!
- Vacuum any loose soot, ash, or dust from the firebox and glass.
- Moisten a cloth with warm water. It is important that you keep this cloth moist throughout the cleaning process in order to avoid scratching the glass.
- Apply your cleaner to the cloth.
- Rub the cleaner over the glass , playing extra attention to the areas that are displaying heavy build-up.
- With short circular motions, apply gentle pressure to remove stains.
- Reapply as needed.
- Once your fireplace door glass is clean, wipe clean with a new, damp cloth.
- Dry with a clean cloth.
While these products are very effective, this process may take some time and effort depending on the amount of build-up. You may find yourself removing the stains, layer by layer, until they are gone. Be sure to take breaks as necessary. Regular cleanings will minimize heavy staining.
Be sure to use one of our terrific polishing formulas on your fireplace door frames! Easily remove evidence of heat discoloration, fingerprints, scuff marks, and soot residue with a multi-surface cream, such as Flitz Polish! This concentrated product is non-abrasive, non-toxic, non-flammable, and approved for use on metals, steel, plastic, fiberglass, brass, marble, and more!


