
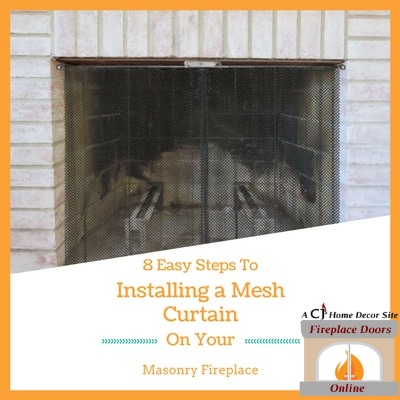
8 Easy Steps To Installing a Fireplace Mesh Curtain
 You've bought a fireplace mesh curtain kit and you're ready to install it on your masonry fireplace. You open it up and see all the pieces and get a little overwhelmed trying to figure out how to install it. Well, there's good news: Installing your steel spark screen curtain doesn't have to be daunting. With the right instructions and tools at your disposal, you can easily have it installed in less than 30 minutes!
You can download a handy PDF of these directions, here.
Did you know that all of our fireplace mesh curtains are made right here in the USA? That's right! We pride ourselves on sourcing as many American Made products as possible.
First, let's gather the tools and supplies you'll need.
- 2 Mesh Curtains With Rings & Pulls (in your kit)
- Mounting Bracket (in your kit)
- 3 Screws (in your kit)
- 2 Rods (in your kit)
- Pencil
- Measuring Tape
- Drill With Masonry Bit
- Screwdriver
- Hacksaw
Click on the infographic below to enlarge for a better view!
Step 1:
- Measure your fireplace width from just inside the firebox.
- Make sure to use a metal tape measure. If you're unsure on how to properly use a tape measure, please read over this info page in our resource center on measuring.
- Mark that measurement down.
- Example: 42 Inches
Step 2:
- Divide that measurement in half.
- Example: 21 Inches
- Use the number you reached above to measure in from the side of the fireplace and mark the fireplace at that point using your pencil. You have now marked the center of your fireplace.
Step 3:
- Find your lintel bar and drill up through the lintel iron at that center point. This can be somewhat awkward since you have to drill straight up.
- If you're unsure of what the lintel iron is, please read this info page in our learning center.
- A lintel bar is not the same as a riser bar. CLICK HERE to read about the difference between the two.
Step 4:
- Take the mounting bracket and screw it up into the lintel bar.
- See the image to the right (Step 4) for how it should look when screwed in.
- Do not put the rods in yet!
Step 5:
- Calculate 1/2 the width of your firebox + 2.5 inches. This is the length that you need to cut your rods.
- Using your hacksaw, cut the rods to length.
- Make sure not to cut the rods on the ends that have the screw holes.
- Example: 21 inches + 2.5 inches = 23.5 inches
Step 6:
- Slide the newly cut rod through the mounting bracket.
- Hold it up to the edge of the fireplace.
- Mark where it meets the edge of the masonry.
- Repeat on the other side.
Step 7:
- Using the masonry bit in your drill, pre-drill the holes you just marked.
- This is where the ends of the rod will be screwed into your fireplace.
- Example: 42 Inches
Step 8:
- Thread each rod through the rings of one curtain, then through the mounting bracket.
- Screw the rod into the place where you pre-drilled the holes on the side of the firebox.
- You've now installed your hanging mesh fireplace kit!
Now that you see how easy it is to install your fireplace mesh curtain...
Simple and routine maintenance that involves caring for and cleaning your spark protection will be a breeze in the future! If you're reading this article and have an existing mesh that could benefit from a new coat of paint, watch this video "How To Paint Fireplace Mesh"
Our warehouse manager, Mike, gives you easy to follow visual instructions on how to accomplish this task in no time! Looking for the perfect high-temperature spray paint for this project? CLICK HERE to visit our stove and fireplace paint category!
No posts found


