72" White Mountain Hearth Profile Fireplace Mantel Shelf
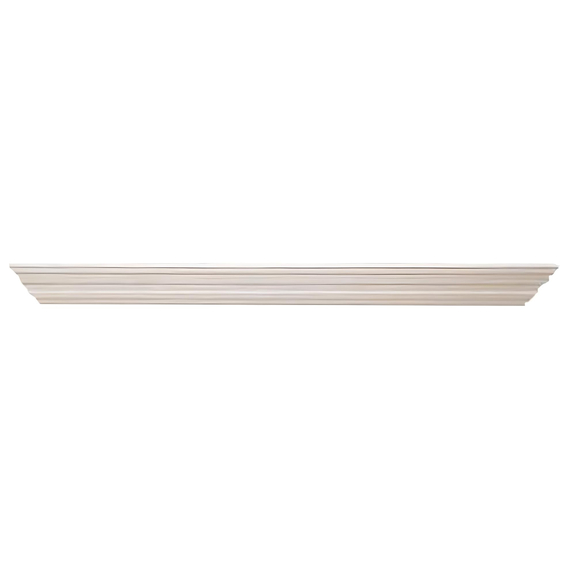
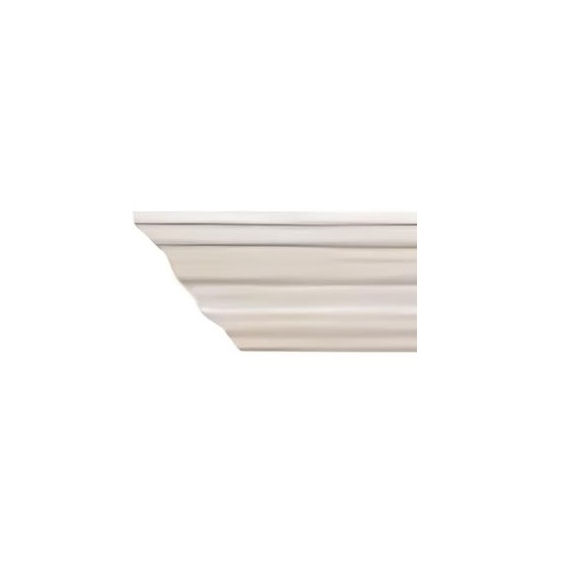
The 72" White Mountain Hearth Profile Fireplace Mantel Shelf combines style and functionality to create the perfect finishing touch for your fireplace. Crafted with attention to detail, this mantel shelf has a clean, classic profile that complements a variety of home decor styles. Made from high-quality materials and finished in a durable, white coating, it adds a sophisticated look and sturdy surface above your fireplace.
Features:
- Quality Construction: Built from robust materials to provide durability and stability.
- Classic Design: A versatile profile design that enhances both traditional and modern fireplaces.
- Easy-to-Clean Finish: Smooth white finish for easy maintenance and a fresh look year-round.
- Generous 72-Inch Length: Ample surface space for displaying photos, decorations, or seasonal accents.
Installation Instructions:
- Locate the Wall Studs: Use a stud finder to mark where the wall studs are above your fireplace.
- Install Mounting Bracket: Position the mounting bracket on the wall at the desired height, making sure it’s level. Secure the bracket by screwing it into the wall studs.
- Attach the Mantel Shelf: Slide the mantel shelf onto the mounting bracket, ensuring it’s flush with the wall. Once positioned, double-check stability.
- Final Adjustments: Confirm that the shelf is level, and make any final adjustments as needed.
This mantel shelf adds a stylish, polished look to your fireplace, providing both beauty and functionality.
Specifications:
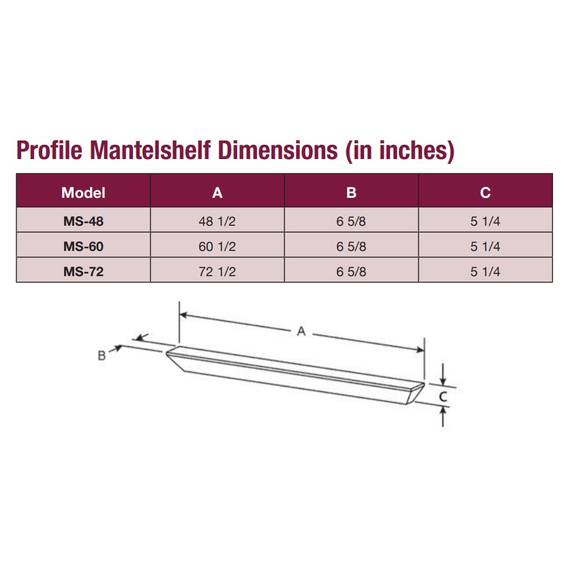
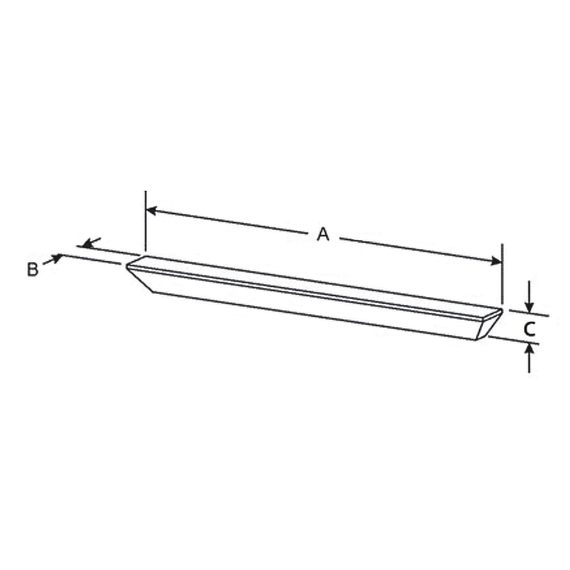
- Length(A): 72 1/2 Inches
- Height(C): 5 1/4 Inches
- Shelf Depth(B): 6 5/8 Inches
- Material: Hardwood

Downloads:
Step-by-Step Guide to Installing a Fireplace Mantel
Installing a new fireplace mantel can be a transformative project for any room, giving it an instant upgrade and creating a focal point that is both functional and aesthetically pleasing. Whether you’re using your mantel to display seasonal decor or to mount a television, this task is manageable for homeowners who have basic DIY experience. By following this guide, you’ll learn how to safely and efficiently install a mantel, while ensuring compliance with important safety standards.
We’ll walk through every step of the process, from preparation to the final finish, with an emphasis on making sure your mantel is both beautiful and secure.
Safety Considerations When Installing a Mantel
Before we dive into the installation process, it’s crucial to address two key safety issues:
- Distance from the Firebox: Any combustible material, like a wooden mantel, must be installed at a safe distance from the fireplace opening. The general rule of thumb, as per the National Fire Code, is to maintain 1 inch of clearance from the firebox opening for every 1/8 inch the mantel protrudes. The minimum safe distance is typically 6 inches, but local codes may vary, so always check with your area’s regulations.
- Secure Attachment: Mantels can be heavy, so attaching them securely to the wall is essential to prevent accidents. Some kits suggest using nails or silicone adhesive, but for the sturdiest installation, it’s best to attach the mantel to cleats—wooden supports that provide a solid foundation.
Now that you understand the basics of safety, let’s move on to the step-by-step guide to installing your fireplace mantel.
Tools You’ll Need
Having the right tools on hand will help you complete the job efficiently. Here’s a list of essential tools and materials:
- Hammer drill
- 3-foot level
- Masonry bit (3/16 inch)
- Saw (hand saw or power saw)
- Torpedo level
- Caulk gun
- Screwdriver
- Tape measure
Optional but Helpful Tools:
- Safety goggles and a dust mask
- Stud finder (for wood-stud walls)
- Pencil for marking
- Sandpaper in various grits
- Paintbrush or stain applicator
Step-by-Step Instructions for Fireplace Mantel Installation
1. Assemble the Mantel Pieces
Begin by gathering and preparing the components of your mantel. If your mantel comes in multiple parts (such as a shelf and legs), you’ll need to assemble them before installation.
- Preparation: If you plan to paint or stain the mantel, sand and prime the pieces beforehand, but hold off on the final coat until installation is complete.
- Assembly: Place the mantel shelf face-down on a soft surface like a rug or tarp to avoid damage. Align the dowels with their corresponding holes on the legs, and slide them into place. Ensure the legs fit snugly, then secure the assembly using screws or the locking mechanisms provided by the manufacturer.
2. Perform a Dry Fit
Before drilling any holes, perform a dry fit to ensure that the mantel is positioned correctly.
- Positioning: With the help of a friend, hold the mantel in place against the wall, making sure it is centered around the firebox. Use a 3-foot level to ensure the mantel is level horizontally.
- Check for Level: Use a torpedo level to check that the shelf is level from front to back. Adjust if necessary by placing shims under the legs.
- Mark the Wall: Once the mantel is properly positioned, lightly trace its outline on the wall with a pencil. This will serve as your reference when installing the cleats.
3. Measure and Cut the Cleats
Cleats are the wooden supports that you’ll attach to the wall to hold the mantel securely. They are typically made from 2x4 lumber.
- Measure: Start by measuring the inside width of the mantel shelf. This measurement will determine the length of your top cleat.
- Cut: Cut a 2x4 to the length you’ve measured. This will be your horizontal cleat, which will support the mantel shelf.
- Vertical Cleats: If the mantel legs are hollow, you’ll also need vertical cleats for added support. Measure the depth and length of the legs and cut 2x4s to match. Depending on the mantel’s thickness, you may need to stack two cleats together for extra support.
- Dry Fit Cleats: Position the cleats within the mantel to ensure they fit properly before attaching them to the wall.
4. Drill Pilot Holes in the Wall
To securely fasten the cleats to the wall, you’ll need to drill pilot holes.
- Mark the Wall: Measure the thickness of the mantel edges that will rest against the wall. Transfer this measurement to the wall by making several marks inside the traced outline of the mantel.
- Draw a Guide Line: Use a level to connect these marks, creating a straight guide for the cleats.
- Drill Pilot Holes: Hold the top cleat against the wall along the guide line. Using a hammer drill with a masonry bit, drill evenly spaced pilot holes through the cleat and into the brick. Be sure to drill into the brick rather than the mortar, as brick offers a more secure anchor.
5. Attach the Cleats to the Wall
Now that you’ve drilled the pilot holes, it’s time to attach the cleats.
- Secure the Top Cleat: Use 2-1/2 inch concrete screws to attach the top cleat to the brick wall. Make sure the cleat is level and securely fastened.
- Attach Vertical Cleats: If you’re using vertical cleats for the mantel legs, repeat the process for these. Ensure they are properly aligned with the top cleat.
- For Wood-Stud Walls: If attaching the mantel to a wood-stud wall, use 3-inch decking screws instead of concrete screws.
6. Install the Mantel
With the cleats firmly in place, it’s time to install the mantel.
- Fit the Mantel Over the Cleats: Lift the mantel and carefully slide it over the cleats. The cleats should fit snugly inside the mantel.
- Align with the Outline: Make sure the mantel is aligned with the outline you traced earlier, ensuring that all edges are flush against the wall.
- Secure the Mantel: Using a screwdriver, drive 2-inch finish screws into the back of the shelf, above the top cleat, spacing them every 16 inches. Repeat this process along the sides of the mantel legs, securing them to the vertical cleats.
7. Secure the Mantel in Place
To ensure the mantel is securely fastened to the wall, follow these steps:
- Drive Additional Screws: Drive 2-inch finish screws every 16 inches along the back of the mantel shelf, and through the legs into the cleats.
- Conceal Screw Heads: Once the mantel is firmly in place, cover the screw heads with wood filler or putty. This will give the mantel a clean, finished appearance.
8. Apply the Finishing Touches
With the mantel installed, it’s time to add the final details that will complete the project.
- Edge Molding: If there are gaps between the mantel legs and the wall or brick surround, attach thin pieces of edge molding to cover the gaps. Use finish nails to secure the molding in place.
- Caulk and Fill Gaps: For a seamless finish, apply caulk along the edges where the mantel meets the wall. This is especially important if you plan to paint the mantel.
- Final Coat: If you haven’t already painted or stained the mantel, now is the time to apply the final coat. Be sure to follow the manufacturer’s instructions for drying times between coats.
Installing a fireplace mantel is a rewarding DIY project that can transform your living space. By following this step-by-step guide, you’ll ensure that your mantel is installed securely and safely, providing you with a stunning centerpiece for years to come. Remember to always adhere to safety standards, especially regarding the mantel’s proximity to the firebox, and consult local building codes for any additional requirements.
With careful preparation, the right tools, and attention to detail, you can successfully install a mantel that enhances both the look and functionality of your fireplace.
Manufacturer's Warranty
NAPOLEON products are manufactured under the strict Standard of the world recognized ISO 9001 : 2008 Quality Assurance Certificate. NAPOLEON products are designed with superior components and materials assembled by trained craftsmen who take great pride in their work. The burner and valve assembly are leak and test-fired at a quality test station. The complete appliance is again thoroughly inspected by a qualifi ed technician before packaging to ensure that you, the customer, receives the quality product that you expect from NAPOLEON. The following materials and workmanship in your new NAPOLEON gas appliance are warranted against defects for as long as you own the appliance. This covers: combustion chamber, heat exchanger, stainless steel burner, phazer™ logs and embers, rocks, ceramic glass (thermal breakage only), gold plated parts against tarnishing, porcelainized enameled components and aluminum extrusion trims.* Electrical (110V and millivolt) components and wearable parts are covered and NAPOLEON will provide replacement parts free of charge during the fi rst year of the limited warranty. This covers: blowers, gas valves, thermal switch, switches, wiring, remote controls, ignitor, gasketing, and pilot assembly.* Labour related to warranty repair is covered free of charge during the fi rst year. Repair work, however, requires the prior approval of an authorized company offi cial. Labour costs to the account of NAPOLEON are based on a predetermined rate schedule and any repair work must be done through an authorized NAPOLEON dealer. * Construction of models vary. Warranty applies only to components included with your specifi c appliance. NAPOLEON GAS APPLIANCE PRESIDENT’S LIFETIME LIMITED WARRANTY
No reviews found


